
ManufacturerChoosing tailor scissors is not just a matter of picking the sharpest pair. Blade length, handle shape, fabric weight, and cutting posture all affect control. A long pair of dressmaking shears can glide through broad fabric panels, while compact embroidery scissors can reach tight corners. Small details matter. The wrong tool may leave a jagged edge, strain the hand, or slow a careful alteration.
The scale of the textile industry helps explain why cutting tools deserve attention. Textile Exchange’s Materials Market Report 2024 estimates that global fiber production reached 124 million tonnes in 2023. It could rise to 160 million tonnes by 2030 if current trends continue. This report measures fiber production, not scissor sales, so it cannot tell us which models are most popular. Still, it offers useful context: fabric remains a vast material category, and precise cutting matters across sewing work.
This guide compares the main types of tailor scissors, including dressmaker shears, classic tailor shears, pinking shears, thread snips, and embroidery scissors. It will explain what each tool cuts best, where its design helps, and what limitations to consider. Not every pair fits. A heavy forged shear may suit frequent shop use, but feel tiring during a small home project. That trade-off is easy to overlook. The best choice depends on the fabric, task, hand comfort, and maintenance—not on one universal ranking.
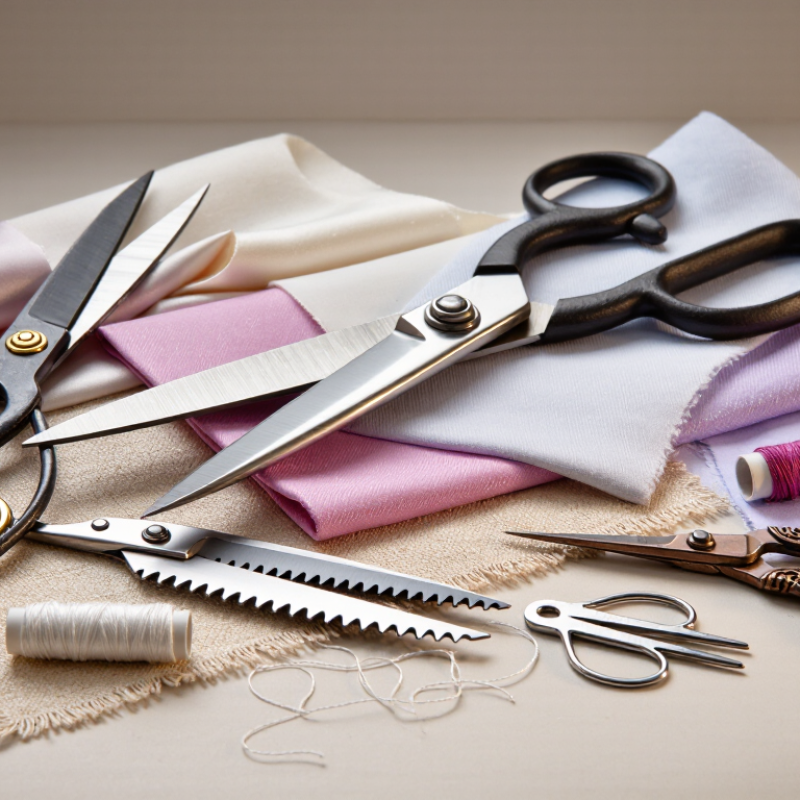
Tailor scissors are commonly classified by blade design, handle shape, and intended fabric. Long-bladed tailor shears cut broad, straight lines through several layers of cloth. Their angled handles let the lower blade rest against a cutting table, helping fabric stay flat. Dressmaking shears are often grouped with them, though sellers may use the terms differently. The labels can be messy.
Blade edges offer another useful distinction. Plain-edge scissors make clean cuts in woven fabric and suit most garment work. Pinking shears have toothed blades that leave a zigzag edge, which can reduce fraying on some fabrics. They do not replace careful seam finishing. Serrated blades grip slippery material, but may leave marks or feel less smooth on delicate cloth. Test them on a scrap first.
Scissors are also sorted by size, weight, and handedness. Longer blades cover more distance, while compact pairs give better control around curves and small pattern pieces. A balanced pair should open without strain and close evenly to the tip. Material matters, too: sturdy steel holds an edge, but maintenance still affects performance. Even a well-made pair can disappoint if it feels awkward in your hand.
What Are the Top Types of Tailor Scissors?
Dressmaking Shears for Long, Straight Cuts
Dressmaking shears are designed to make long, steady cuts through fabric. Their long blades can reduce the number of snips needed across a wide piece of cloth. The lower blade usually rests flat on the cutting table, helping keep fabric from lifting as you cut. This is useful when cutting a skirt panel or a straight trouser seam. A comfortable handle matters, too; repeated cuts can strain fingers if the grip feels cramped.
These shears work best on fabric laid flat and smoothed before cutting. Keep the blades aligned with your marked line, and close them fully through each stroke. Small, hesitant snips can leave a jagged edge, especially on slippery lining fabric. Still, long blades are not automatically easier for everyone. If the fabric shifts, pause and reset it rather than forcing the cut.
Tips: Use dressmaking shears only for fabric, since paper can dull their edges. Check that the pivot screw feels secure, and wipe lint from the blades after use. For a long cut, let the lower blade glide against the table. A little practice helps; the first line may not be perfect.
Representative commonly available overall sizes are shown in inches; actual sizes vary. Tailor and dressmaking shears, often around 8–12 inches long, are practical choices for long, straight fabric cuts. Shorter scissors are generally better suited to detail work.
Heavy-duty tailor shears are designed for dense cloth that can resist lighter sewing scissors. Their long blades and sturdy pivots help cut denim, canvas, wool coating, and several fabric layers. The extra leverage can make a clean cut feel easier, but it does not replace a sharp edge. That matters.
For thick materials, spread the fabric flat and align the layers before cutting. Hold the blades close to the work surface, then use long, steady strokes rather than short, forceful bites. If the stack shifts, pin or weigh it down and test the cut on a scrap first. Not always. Very bulky seams or folded stacks may exceed what the shears can cut cleanly, so forcing the blades can distort the fabric and strain your hand.
Weight and handle shape matter during longer cutting sessions. A solid pair should feel balanced, open smoothly, and sit comfortably in your grip; heavier is not automatically better. Check that the pivot stays firm and the blades meet evenly along their length. After use, brush away lint and wipe the blades dry, especially after cutting coated or damp fabric. Keep them for textiles rather than paper, which can dull the edge sooner. One detail is easy to overlook: even good shears need occasional sharpening, and a slightly rough cut is a reason to inspect the edge, not press harder.
Detail scissors are designed for small, controlled cuts that larger tailor shears may handle clumsily. Their short blades help trim loose thread ends, clip seam allowances, and shape small fabric curves. A fine point can reach close to a stitch without pulling nearby fibers, but keep the blades angled away from the fabric you want to preserve.
Small, precise cuts matter. Work under good light, and turn the fabric rather than twisting your wrist around a tight corner. For delicate cloth, test the scissors on a scrap first; a sharp tip can snag thin or loosely woven fibers. They are not ideal for cutting long straight seams, and they can feel awkward at first. A rushed hand may leave a tiny nick that is hard to hide.
Keep them clean. Wipe lint from the blades after use, and store them closed in a dry place. Check that the pivot moves smoothly and the blades meet evenly. If they begin folding thread instead of slicing it, have them sharpened or use a sharper pair. Small tools still need care.
Pinking shears cut a zigzag edge that can slow fraying on many woven fabrics. Their triangular teeth shorten loose threads along the cut, leaving a neat, sawtooth finish. They are useful for seam allowances, lightweight linings, and small fabric pieces that may be difficult to overlock. The edge also adds a subtle decorative detail to hems or craft projects. It is a practical finish, not magic.
For clean results, keep the fabric flat and make one steady cut rather than several small snips. Dull or misaligned blades may leave uneven teeth, so check the cut on a scrap first. These shears work best on stable woven cloth; stretchy knits can curl or shift under the blades. They also do not stop fraying completely, especially on loosely woven fabric or edges that receive frequent washing.
I find that easy to overlook.
Choose a fabric-appropriate finish when the edge needs to withstand heavy wear, and keep pinking shears sharp and reserved for fabric. They are less useful for trimming thick layers, where the teeth may struggle to cut cleanly.
Their long blades make steady cuts across broad fabric panels. The lower blade can rest on the table. That helps keep cloth flat.
No. They cover more distance, but compact scissors can offer better control around curves. The first cut may feel awkward.
Plain-edge scissors make clean cuts in woven fabric. Pinking shears leave a zigzag edge that may reduce fraying. They do not replace seam finishing.
They can grip slippery material. On delicate cloth, they may leave marks or feel rough. Test a small scrap first.
They can handle many dense fabrics, including denim, canvas, and wool coating. Align the layers and cut steadily. Some stacks are simply too bulky.
Smooth the fabric and follow the marked line. Use full, steady strokes. If the cloth shifts, pause and reset it.
They should open smoothly and close evenly to the tip. A balanced grip matters. Heavier does not always mean better.
Brush away lint and wipe the blades dry after use. Keep them for fabric, not paper. Check the edge if cuts become rough; pressing harder may not help.
Tailor scissors are available in several types, each suited to a different sewing task. Dressmaking shears have long blades that help create smooth, straight cuts through fabric, making them useful when cutting garment pieces or handling larger sections. For thicker materials or multiple layers, heavy-duty tailor shears provide a sturdier option, helping maintain control and cut cleanly without excessive effort.
Smaller detail scissors are designed for precision work, such as trimming threads, shaping small sections, and reaching tight corners. Pinking shears offer a different finish: their zigzag blades create decorative edges that can help reduce fraying on suitable fabrics. Choosing among these types depends on the material, the scale of the cut, and the level of accuracy or edge finish needed. With the right tailor scissors for each task, sewing work can be neater and more efficient.