
0%

Acrylic tip cutters may look like simple salon tools, yet their cut can affect the shape, balance, and finishing time of an enhancement. A blunt or poorly aligned blade may crush a tip instead of creating a clean edge. The right tool should feel steady in the hand and suit the length and thickness you regularly trim. Small tool. Real difference.

This guide to the Top 10 Acrylic Tip Cutters for Nail Professionals compares practical details that matter at the workstation: blade sharpness, cutting consistency, handle comfort, durability, and ease of cleaning. It also considers whether a cutter offers adjustable length settings and how securely it closes between uses. These features can help narrow the options, but no single design fits every hand or service style.

A product ranking is only a starting point. Check the manufacturer’s care instructions, inspect the cutting edges, and test control on a practice tip before using a new tool during a client service. Pay attention to how the handles sit in your fingers after repeated cuts; comfort can be hard to judge from a product photo. Prices and availability may change, too. Even a well-reviewed cutter can feel awkward in daily use, so consider these picks alongside your own technique and workload.
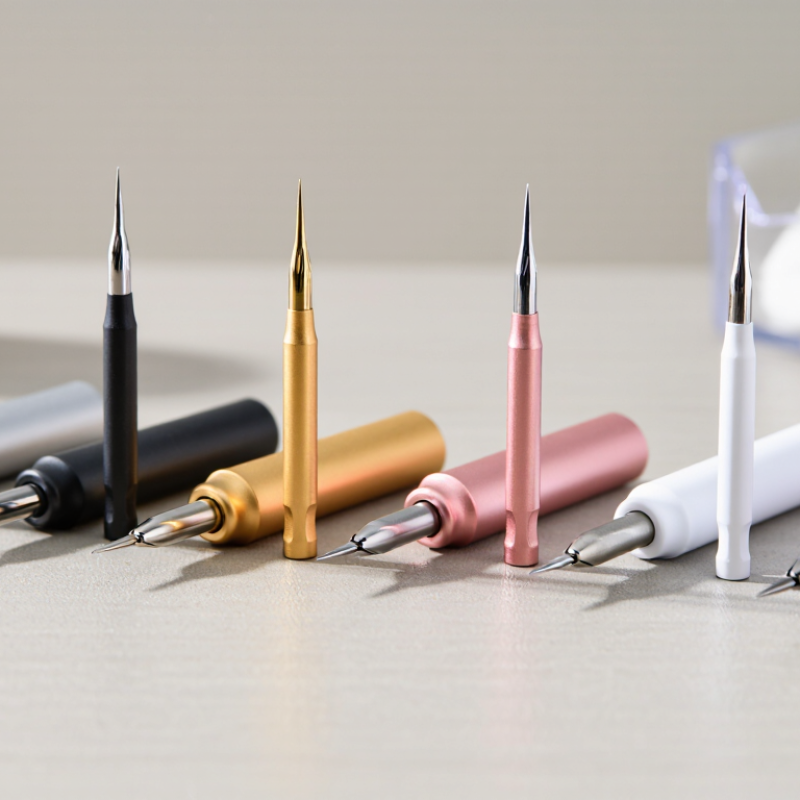
Top 10 Acrylic Tip Cutters for Nail Professionals

Acrylic Tip Cutters: Purpose, Design, and Role in Nail Services

Acrylic tip cutters shorten artificial nail tips to a workable length before shaping and product application. Their compact jaws concentrate pressure, creating a quick cut with less hand movement than ordinary scissors. Jaw shape affects control: a curved edge can help create a tapered outline, while a straighter edge leaves more room for later filing. The handle should feel stable, and the cutting edges should meet cleanly. A cutter is not a substitute for a file; it makes the rough length adjustment, not the final contour. Small differences matter.

In nail services, controlled trimming helps keep both sides of an extension balanced and reduces unnecessary filing. Cut a little at a time. A common, easy-to-miss mistake is taking off too much when the tip is held at an awkward angle. That can leave an uneven edge or put stress on the tip. Avoid cutting close to the natural nail, and do not force dull jaws through resistant material. If a tip flexes or cracks, pause and reassess rather than trimming harder.

Tips: Hold the tip securely and cut away from the client’s skin. Check both sidewalls after each trim. Clean and inspect the cutter between services, and replace it if the jaws become loose, blunt, or misaligned. Even careful work can need a small correction with a file.

Key Features for Evaluating Professional Acrylic Tip Cutters

A professional acrylic tip cutter should deliver a controlled, clean cut without crushing the tip or leaving sharp, uneven edges. Check that the blades meet evenly from heel to point; hold the tool toward a light and look for gaps. Test it on a spare tip, not a client’s set. The handle should provide stable leverage without forcing a tight grip. Smooth opening and closing matter during repeated services. Fit matters.

Material and maintenance deserve equal attention. Stainless steel can resist corrosion, but it still needs proper cleaning and drying according to workplace procedures. Look for a secure pivot, comfortable finger loops, and blades suited to the tip shapes you use most. Grand View Research valued the global nail care market at $23.41 billion in 2023 and forecast 5.2% annual growth from 2024 to 2030. That is broad market context, not evidence of cutter performance. A tool can feel precise in hand and still leave a rough edge; that detail is easy to miss.

Tips: Make a small test cut before service. Compare the edge under bright task lighting, and replace or service cutters that begin to crush tips. Don’t choose by appearance alone.

Cutter Types and Their Cutting Mechanisms

Top 10 Acrylic Tip Cutters for Nail Professionals

Cutter Types and Their Cutting Mechanisms

Acrylic tip cutters generally use a guillotine blade, a scissor-like pivot, or straight clipper jaws. A guillotine cutter drives one blade across a fixed opening, making a quick, single-direction cut. Pivot cutters close two edges together, while clipper jaws compress the tip between opposing blades. Each mechanism can leave a different edge: a clean slice, a slight bevel, or a crushed-looking end if the tool is dull or poorly aligned. Small details matter. The U.S. Bureau of Labor Statistics estimated 194,000 manicurists and pedicurists were employed in 2023, underscoring how often precision tools are used across the profession.

For control, match the cutter to the tip’s thickness and the desired shape. Set the tip securely, keep the blades perpendicular for a straight cut, and trim in small increments rather than forcing a thick section through. A curved cut may help shape a smile line, but it can also produce uneven lengths. A neat cut is not always a clean cut; inspect the edge for splits before filing. That extra check is easy to skip.

Tips: Wipe blades between clients, check the hinge for looseness, and replace cutters that snag or crush tips. Test the cut on a spare tip first. Don’t rush.

Ten Acrylic Tip Cutters and Their Distinguishing Features

Acrylic tip cutters differ in jaw shape, leverage, and control. A straight-jaw cutter makes a simple, even cut across the tip. A curved-jaw model follows a rounded outline, useful when shaping a softer curve. A guillotine-style cutter holds the tip in a slot before its blade descends. Check that the slot fits the tip without squeezing its sidewalls. A spring-return cutter opens after each cut, reducing hand effort during repeated work. Small detail matters.

An adjustable-stop cutter limits how much length is removed, helping create more consistent sets. A long-handle cutter offers extra leverage for firm tips, though it may feel bulky in smaller hands. A compact cutter is easier to store and maneuver near short nails. Its shorter handles can require more pressure. A textured-grip model helps steady the tool when fingers are gloved or slightly damp. Still, grip texture cannot replace careful positioning.

A replaceable-blade cutter can stay useful longer, but only if replacement parts are available and fitted securely. A stainless-steel cutter is valued for its corrosion resistance and straightforward cleaning; material alone does not guarantee sharpness. Before client work, test the cut on a spare tip. Look for a clean edge, no crushing, and a comfortable hand position. Even a good cutter can leave a rough edge, so inspect each result and refine it with a file when needed.

Top 10 Acrylic Tip Cutters for Nail Professionals

Ten Acrylic Tip Cutters and Their Distinguishing Features

This chart is a feature checklist of ten generic cutter design profiles, not a ranking or a test of specific products. A value of 1 means the feature is included in that illustrative profile; 0 means it is not. Actual tools vary by design.

How to Select, Sanitize, and Maintain a Salon-Ready Cutter

A salon-ready acrylic tip cutter should feel stable in the hand, with blades that meet evenly and a pivot that moves without grinding. Check the cutting edge against a sample tip: it should make a clean cut, not crush or split the plastic. Choose a size that suits your usual work, and keep it for artificial tips rather than natural nails. Small detail, big difference. Loose screws, rust, or a nicked edge can make control harder; replace or repair the tool instead of forcing it through a cut.

Clean before disinfecting: remove visible dust and product residue, wash the cutter with detergent, then dry it. Apply a disinfectant labeled for the tool’s material, and follow its stated wet-contact time. A quick wipe may not be enough. CDC’s 2000 report on California salon whirlpool footbaths described 110 customers who developed boils; those were footbath infections, not cutter-related, but the report underscores why salon cleaning routines matter. Store the dry cutter in a clean, closed container, and inspect the pivot and blades at the start of each shift. If the manufacturer’s care instructions conflict with a general routine, follow the tool-specific directions and your local salon requirements.

Top 10 Acrylic Tip Cutters for Nail Professionals - How to Select, Sanitize, and Maintain a Salon-Ready Cutter

Rank Cutter Style Typical Design and Material Best For Selection Checks Sanitizing and Maintenance Notes
1 Standard straight-edge cutter Compact hinged cutter, usually stainless steel, with a straight cutting edge. Routine shortening of acrylic extensions before filing. Check that the jaws meet evenly and cut cleanly without crushing the tip. Remove visible debris, clean, and use an appropriate salon disinfectant according to its label. Dry fully and keep the hinge lightly maintained as directed.
2 Curved-edge cutter Hinged cutter with a gently curved jaw profile for a rounded cut line. Creating a softer outline on rounded or oval extensions. Look for a smooth, symmetrical curve and enough jaw clearance for the tip thickness. Clean around the curved jaws with a small brush before disinfection; dry thoroughly to limit corrosion and residue buildup.
3 Angled-jaw cutter Offset or angled cutting head designed to improve access at different working angles. Detail work and trimming tips when a straight-on approach is awkward. Confirm the head is stable, the handles move smoothly, and the cutting edge is aligned. Pay extra attention to the angled joint when removing dust and product fragments. Follow the tool and disinfectant care instructions.
4 Heavy-duty cutter Sturdier handles and reinforced jaws intended for frequent salon use. Regular services and thicker artificial tips within the tool's stated capacity. Check the manufacturer's maximum tip thickness; do not force the jaws beyond their rated capacity. Inspect the pivot and edge regularly for looseness, chips, or drag. Disinfect only with products compatible with the tool's material.
5 Compact travel-size cutter Shorter handles and a small cutting head for easy storage and controlled handling. Mobile services, small workstations, or technicians who prefer a compact grip. Test handle comfort and leverage; a compact tool may require more hand pressure than a full-size model. Store in a clean, dry case after cleaning and disinfection. Keep the cutting edge protected from impact.
6 Ergonomic soft-grip cutter Cutter with shaped or cushioned handles; grip materials vary by model. Long service days or users who prefer a broader, more comfortable handle. Check that the grip is secure and that its material can tolerate the intended cleaning process. Do not soak or heat-process a soft-grip tool unless the manufacturer confirms it is safe. Clean and disinfect according to its care instructions.
7 Spring-assisted cutter Hinged design with a return spring that reopens the handles after each cut. Repeated trimming where quick reopening helps maintain a steady working rhythm. Test spring action and check that the spring is secure and does not obstruct cleaning. Remove debris around the spring and hinge. Use a disinfection method compatible with all components; dry completely before storage.
8 Adjustable-stop cutter Cutter with a stop or guide intended to help control the cut position; features vary by design. Consistent shortening when a repeatable cutting position is useful. Check that the stop locks securely and does not interfere with the cutting jaws or cleaning access. Clean around the guide and its adjustment points. Confirm that the full tool can be disinfected as directed by the manufacturer.
9 Replaceable-blade cutter Design with a replaceable cutting component; blade replacement method is model-specific. Users who want to renew a worn cutting component without replacing the entire tool. Confirm replacement parts are available and that the blade can be installed securely and safely. Handle blades carefully and follow the maker's replacement and disinfection instructions. Never use a loose or damaged cutting component.
10 Fine-control mini-jaw cutter Small jaw profile intended for controlled trimming of narrow sections. Precision adjustments and smaller tips where a broad jaw may feel less controllable. Assess grip stability and jaw reach; a small jaw is not a substitute for a cutter rated for thicker material. Brush out small crevices before disinfection. Store separately so the fine cutting edge does not strike other tools.

Salon care reminder: Clean tools before disinfection, follow the disinfectant label and local salon regulations, and use only the processing method approved for the cutter. Inspect cutting edges and joints routinely; replace or repair tools that are damaged, loose, or no longer cut cleanly. Do not use a tip cutter on natural nails or beyond its stated capacity.

FAQS

How do acrylic tip cutters make a cut?

Guillotine cutters use one descending blade. Pivot cutters bring two edges together, while clipper jaws press from both sides. Each can leave a different edge.

How should I choose a cutter?

Match the jaw shape and leverage to the tip’s thickness and your preferred outline. Long handles may help with firm tips, but can feel bulky.

How can I get a straighter cut?

Secure the tip and keep the blades perpendicular. Trim in small increments instead of forcing a thick section through. Check the edge afterward.

Are curved-jaw cutters useful for shaping?

They can follow a rounded outline or help form a smile line. Check both sides for even length; a curve can turn uneven quickly.

Should I test a cutter before client work?

Yes. Try it on a spare tip and look for a clean edge without crushing. Small detail, big difference.

How can I tell when a cutter needs attention?

Replace or service it if it snags, crushes tips, or feels loose at the hinge. A rough cut can be easy to miss.

What care does a cutter need?

Wipe the blades between clients and check the hinge regularly. Stainless steel resists corrosion, but it does not guarantee sharpness.

Do adjustable stops or textured grips improve control?

An adjustable stop can help remove consistent lengths. Textured grips may steady the tool, though careful positioning still matters. I sometimes skip that check. Don’t rush.

Conclusion

Acrylic tip cutters are essential tools in professional nail services, helping technicians trim artificial tips to a clean, workable length before shaping and finishing. Their design, cutting action, grip, and blade alignment can affect both precision and comfort during repeated salon use. This guide explains the role of acrylic tip cutters and the features professionals can assess, including cutting control, construction, ease of handling, and suitability for different service needs.

It also compares common cutter styles and their mechanisms, then highlights ten options by their distinguishing characteristics without focusing on brand names. The final section offers practical guidance for choosing a cutter, sanitizing it between clients, and maintaining its performance. With the right tool and consistent care, nail professionals can work more efficiently while supporting neat, reliable results.

Alexander

Alexander

Alexander is a professional marketing specialist dedicated to helping businesses understand products, markets, and customer needs through clear, practical, and trustworthy communication. With strong expertise in the company’s product portfolio, he regularly researches industry developments,......