 Manufacturer
since 1971
ManufacturerChoosing embroidery scissors is a small decision with a noticeable effect on needlework. A sharp, balanced pair can trim floss cleanly beside a satin-stitch edge. A poor pair may crush threads, leave fuzzy ends, or slip inside a crowded hoop. Mary Corbet, embroidery educator and founder of Needle ’n Thread, has said, “Good tools make stitching more enjoyable.” That simple observation explains why experienced stitchers examine scissors beyond appearance.
This guide explores top embroidery scissors for precise needlework through practical details. We consider blade sharpness, pointed tips, handle comfort, tension, weight, and cutting control. Some models suit delicate silk threads, while others feel stronger with cotton floss or metallic fibers. The difference can appear after only a few snips. Tiny details matter.
Not every beautiful pair performs perfectly. Some ornate handles feel tiring after ten minutes. Some compact scissors cut cleanly but lack comfortable finger openings. I have also found that personal hand size changes the experience more than product descriptions suggest. That limitation deserves attention. We will compare real-use strengths, likely drawbacks, and suitable stitching situations. Expect close discussion of thread trimming, appliqué work, travel kits, and long embroidery sessions. The goal is not to name one universal winner. It is to help you select embroidery scissors that feel controlled, reliable, and precise in your own hands.
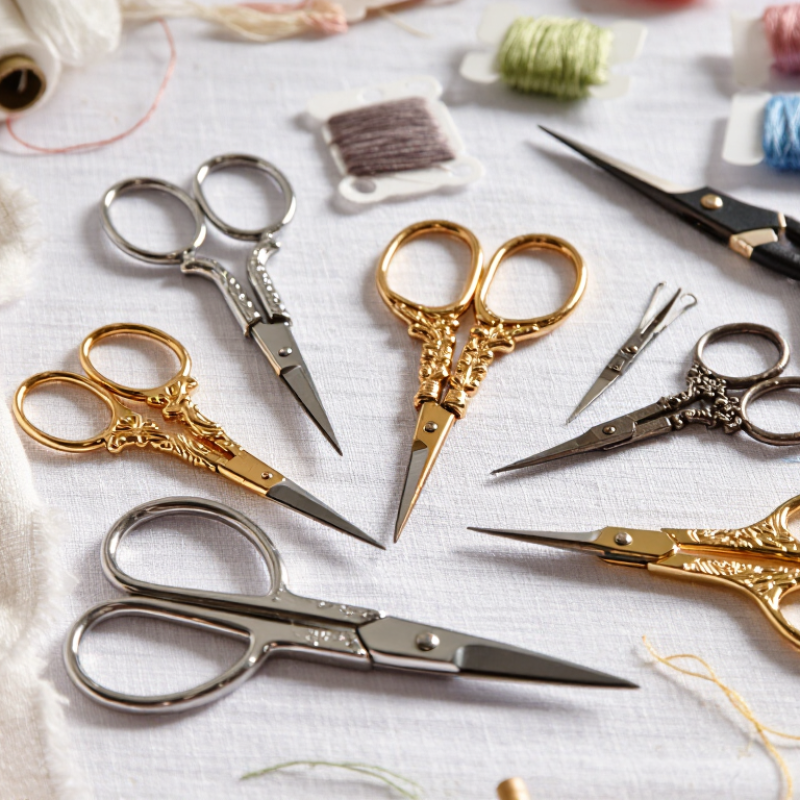
Top Embroidery Scissors for Precise Needlework
What makes embroidery scissors suitable for precise needlework? The answer begins with control, not decoration. A compact length, usually about 9–12 cm, keeps the blades close to the fabric. Fine, sharply aligned tips can reach between satin stitches without pulling nearby threads. Stainless steel also resists moisture, though “rust-proof” should never mean careless storage.
In my own stitching, balanced handles reduce wrist twisting during repeated trimming. A smooth pivot matters too. If the joint feels gritty, tiny movements become tiring and less accurate. EU-OSHA reports that musculoskeletal disorders remain Europe’s most common work-related health problem, with repetitive hand activity among recognised contributors. That finding supports choosing light scissors with comfortable finger openings, but it does not prove every ergonomic claim. Fit still depends on hand size.
Look for blades that close evenly from heel to tip. Test them on a loose thread before cutting valuable fabric. The cut should be clean, not crushed. Some makers prefer pointed blades; others need a slightly safer rounded tip near delicate work. Neither choice is universally best. I once assumed the sharpest point offered the greatest precision. It did not, especially when my grip became tense. A modest blade, steady tension, and regular cleaning often produce better results than impressive specifications.
A practical comparison of common embroidery-scissor profiles and the features that support accurate, controlled cutting.
| Scissor Profile | Typical Overall Length | Blade Tip Style | Cutting Strength | Precision Rating | Best Use | Key Advantage | Important Limitation |
|---|---|---|---|---|---|---|---|
| Fine-Point Embroidery Scissors | 3–4 in (7.5–10 cm) | Very sharp, narrow pointed tips | Light-duty threads and fine fabric | ★★★★★ | Trimming thread tails close to stitches | Excellent visibility and control in small areas | Sharp points require careful storage and handling |
| Stork-Style Embroidery Scissors | 3.5–4.5 in (9–11.5 cm) | Long, tapered pointed tips | Light-duty thread and surface trimming | ★★★★★ | Surface embroidery and decorative needlework | Long tips reach between closely spaced stitches | The narrow tips are less suitable for thick materials |
| Curved-Tip Embroidery Scissors | 3.5–4.5 in (9–11.5 cm) | Fine blades with a slight upward curve | Thread trimming near fabric surfaces | ★★★★★ | Appliqué edges and three-dimensional embroidery | Helps protect the fabric from accidental contact | The curve may feel less natural for straight trimming |
| Short-Blade Thread Snips | 2.5–3.5 in (6.5–9 cm) | Compact pointed or semi-pointed blades | Loose threads and short trimming tasks | ★★★★☆ | Portable sewing kits and quick thread cleanup | Compact size allows rapid one-handed trimming | Short blades provide less reach around bulky work |
| Appliqué Scissors | 5–7 in (12.5–18 cm) | Offset, paddle-shaped lower blade | Fabric layers and appliqué materials | ★★★★☆ | Cutting around appliqué shapes | Raised handle and offset blade improve fabric clearance | Too large and wide for delicate thread trimming |
| Micro-Serrated Embroidery Scissors | 3.5–4.5 in (9–11.5 cm) | Fine pointed blade with micro-serrated edge | Slippery, synthetic, or layered threads | ★★★★☆ | Metallic thread and smooth filament thread | Teeth help hold slippery fibers during cutting | The edge may leave a less smooth cut on delicate fabric |
| Heavier Duckbill-Style Scissors | 5–6.5 in (12.5–16.5 cm) | Broad lower blade with a rounded outer edge | Thicker fabric and raised appliqué work | ★★★☆☆ | Bulk trimming and controlled fabric removal | Rounded blade helps reduce accidental fabric cuts | Not designed for precision thread clipping |
| Selection guidance: For precise needlework, prioritize sharp pointed tips, smooth blade alignment, a comfortable finger grip, and a compact size that provides clear visibility around individual stitches. Measurements and performance descriptions are typical ranges for these tool profiles; actual specifications vary by construction and intended use. | |||||||
Compact scissors, usually 9–12 cm long, keep the blades close to the fabric. Fine tips can reach between satin stitches without pulling nearby threads. Control matters more than decoration.
Narrow, pointed blades slip beneath stitches and support tiny cuts. Rounded tips may feel safer near delicate fabric. Neither shape is always best.
Cut a loose thread first. The blades should close evenly from heel to tip. A clean cut leaves the thread smooth, not crushed. Check the tips under bright light.
Stronger blades handle several fabric layers more effectively. Curved scissors can improve visibility near raised stitches. They may feel awkward at first. Practice on scrap fabric.
Balanced handles can reduce wrist twisting during repeated trimming. Smooth pivots make small movements less tiring. Test the handles for ten minutes, not ten seconds.
Remove lint after each session. Wipe the blades dry and protect the points. Stainless steel resists moisture, but careless storage can still cause problems. Not truly rust-proof.
It is better not to use them for those materials. Paper and thick cord can dull delicate edges quickly. Keep one pair for thread and fabric.
Not necessarily. I once chose extremely sharp scissors for every task and damaged fabric while rushing. A modest blade, steady tension, and clean edges often work better.
Uneven tension can crush threads instead of cutting them cleanly. Check the pivot before difficult work. If movement feels gritty, accuracy may decline. Small details matter.
Choosing the right embroidery scissors can make precise needlework cleaner, faster, and more enjoyable. The best pair typically features sharp, fine-point blades that can reach small spaces and make accurate cuts without pulling or damaging fabric. When comparing options, consider blade length, tip shape, handle comfort, control, durability, and the balance between the scissors and your hand. Different designs serve different needs: straight, pointed scissors are useful for trimming threads and detailed work, while curved or specialized styles may provide better access around raised stitches, tight corners, or layered materials.
To select the most suitable embroidery scissors, match their shape and size to the task, your project’s fabric, and the level of precision required. Small scissors offer excellent control, while longer blades may be more efficient for repeated trimming. Proper handling also matters: use them only for suitable textile tasks, cut with steady pressure, and avoid forcing the blades. Regularly remove lint, keep the blades dry and clean, and store the scissors closed in a safe protective case to preserve sharpness and extend their working life.