
ManufacturerChoosing the right hair thinning shears requires more than picking a sharp, attractive pair. The wrong tool can remove too much weight, create uneven texture, or leave visible gaps in a finished style. A reliable choice begins with understanding blade design, tooth spacing, handle comfort, steel quality, and the amount of hair each cut may remove.
Professional stylists often compare shears under real working conditions. They check how smoothly the blades close, whether the grip supports controlled movement, and how the tool performs on wet and dry hair. Your hand size matters, too. A shear that feels balanced after ten minutes may cause fatigue during a full day behind the chair. Small details matter.
This guide presents seven practical tips for choosing hair thinning shears with greater confidence. It considers cutting goals, hair density, tooth count, maintenance needs, and the difference between beginner and professional tools. Manufacturer specifications can help, but they do not replace careful handling and informed judgment. Some recommendations may work beautifully for one stylist and feel awkward for another. That is worth remembering.
Before buying, consider who will use the shears, how often, and on which hair types. A fine-tooth model may soften heavy edges gradually, while wider teeth can remove more bulk in fewer passes. The most expensive option is not always the best option. Fit, control, and consistent results usually matter more than branding. This guide will help you evaluate those details clearly.
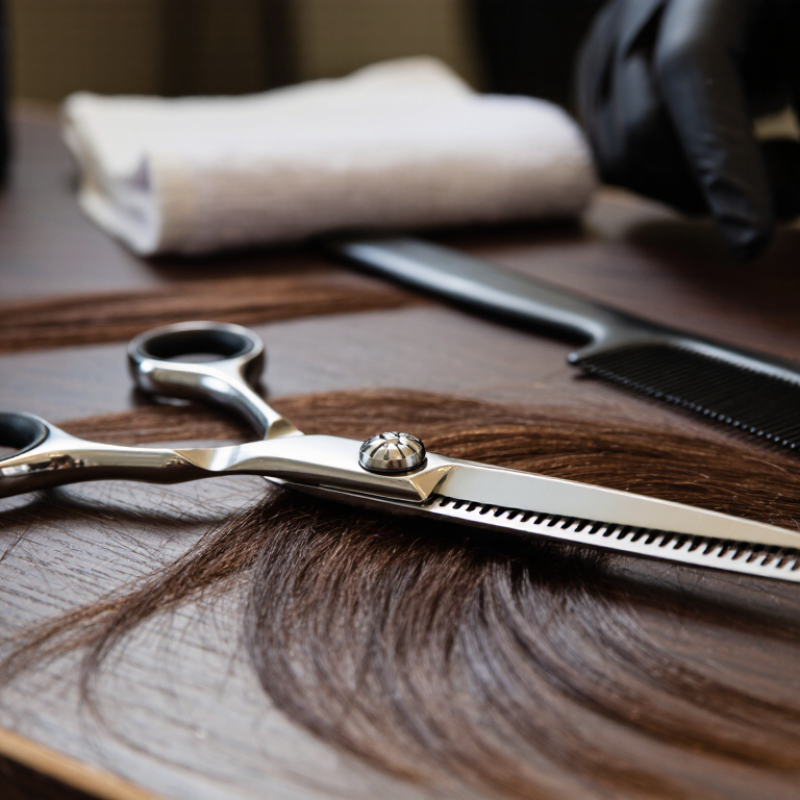
7 Tips for Choosing Hair Thinning Shears
Understanding hair thinning shears starts with their cutting purpose. They remove selected bulk while preserving the haircut’s outer shape. Regular scissors create a solid line. Thinning shears create spaces between strands. Check the tooth count, blade length, handle comfort, tension, and cutting ratio. A pair with fewer teeth removes more hair per closure. That can help dense, coarse sections, but it can also leave visible gaps. Fine hair usually needs smaller, controlled removals. Use them on small sections, away from the scalp. One quiet snip is often enough.
Professional judgment matters more than a product label. The U.S. Bureau of Labor Statistics projects 8% employment growth for barbers, hairstylists, and cosmetologists from 2022 to 2032, with about 89,600 openings each year. This busy field still demands careful tool handling. Hair professionals should inspect sharpness, adjust tension, and sanitize tools according to local professional standards. Poor tension can bend hair instead of cutting it cleanly. That damage may feel rough before it becomes visible.
My early advice was incomplete. I once treated a high tooth count as automatically safer. It was not. Test the shears on a controlled section, then reassess movement, texture, and balance. Avoid repeated cutting over the same area. Thinning shears are not a rescue tool for every heavy haircut. They are precision instruments for gradual weight removal. Look at the finished shape from several angles, especially around the crown and fringe. Client feedback remains essential. A technically neat result can still feel too thin.
Tip: Match the teeth to the density, not just the haircut. Fine, straight hair usually needs blending shears with many teeth. They remove small amounts and leave softer edges. Use one light pass near the mid-lengths. The ends can look weak if you overwork them.
Thick, coarse hair may need texturizing shears with fewer teeth and wider gaps. These remove more weight per cut. Work in small sections, especially around the crown and fringe. I have seen dense hair become uneven after one confident, heavy stroke. A strand test would have prevented it.
Curly and coily textures require extra caution. Thinning can disturb the curl pattern and create uneven shrinkage. Many stylists prefer shaping first, then removing minimal bulk only where necessary. Dry hair reveals its real movement better. Fine curls often respond well to high-tooth blending shears, while dense curls may need controlled, point-cutting techniques instead. Straight, medium-density hair is more forgiving, but excessive texturizing can still create flyaways. Check the hair’s elasticity, porosity, and previous chemical treatment before choosing a shear. The perfect tool does not exist. Careful observation matters more.
Choosing hair thinning shears requires more than counting teeth. Your cutting plan matters.
Tip 1: Check the tooth count. Twenty to thirty teeth usually remove less hair per pass.
Tip 2: Match the count to density. Thick hair may need stronger removal. Fine hair can show gaps quickly.
Tip 3: Examine the tooth spacing. Narrow spacing gives controlled texture. Wide spacing removes larger sections. Use less pressure.
Tip 4: Inspect the blade design. Convex blades often deliver smoother, cleaner movement. Beveled blades can feel more stable during controlled dry cutting.
Tip 5: Check whether the teeth are uniform. Uneven teeth may create visible steps. That problem becomes obvious around the crown.
Tip 6: Estimate the hair removal level. Product descriptions are not fully standardized, so test a small section first. Many professional shears remove roughly 10–20% per pass, but results vary with tooth geometry and technique. This is where my earlier assumption was too simple: tooth count alone does not predict removal.
Tip 7: Consider your working experience. The U.S. Bureau of Labor Statistics projects 8% employment growth for barbers, hairstylists, and cosmetologists from 2022 to 2032. More salon work means consistent tool selection matters. Hold the shears lightly. Keep the blades parallel to the section. The American Academy of Dermatology reports that hereditary hair loss affects about 80 million people in the United States, so thinning hair deserves restraint. Remove gradually, then reassess under bright light.
7 Tips for Choosing Hair Thinning Shears
Handle comfort matters during repeated sectioning. The U.S. Bureau of Labor Statistics’ 2023 injury tables still list sprains, strains, and tears among major days-away-from-work categories. That makes grip design more than a preference. Try shears with a rounded, adjustable handle, smooth finger rings, and enough space for relaxed fingers. Tip one: test them on dry hair. Tip two: keep your wrist straight. Tip three: avoid handles that force your thumb sideways. A small discomfort becomes obvious after several hours.
Balance controls accuracy. Hold the shears by the pivot and open them slowly. They should not drop toward the blade or handle. Tip four: check whether the center of gravity stays near your fingers. Tip five: inspect the tension screw for precise adjustment. OSHA salon ergonomics guidance emphasizes reducing force, repetition, and awkward postures. Professional quality also shows in consistent tooth spacing, clean blade alignment, and a pivot that moves without grinding. Listen closely. Rough movement often signals poor finishing.
I once chose a lighter pair because they felt effortless. My wrist later felt unstable during detailed blending. That mistake still influences my testing. Tip six: compare control, not weight alone. Tip seven: make several controlled passes through a mannequin section before buying. The International Society of Hairdressers’ technical education materials commonly stress controlled sectioning and tool maintenance, but individual technique still changes the result. Certification labels can help, yet they do not replace hands-on inspection. Some “professional” shears simply feel wrong.
| Tip | Key Dimension | What to Look For | Practical Benchmark | Why It Matters |
|---|---|---|---|---|
| 1 Prioritize Handle Comfort | Ergonomics and finger fit | Choose handles that allow the thumb and ring finger to rest naturally without pinching, stretching, or excessive pressure. | Test for 2–3 minutes: the hand should remain relaxed, with no sharp pressure around the thumb joint or finger holes. | A comfortable handle helps reduce hand fatigue and supports consistent control during repeated cutting movements. |
| 2 Check the Balance | Weight distribution | The pivot area should feel stable while the blades and handles should not pull noticeably in opposite directions. | Hold the shears horizontally: they should feel controlled rather than strongly blade-heavy or handle-heavy. | Balanced shears require less corrective effort, improving precision and reducing wrist strain. |
| 3 Match the Tooth Pattern | Number and spacing of teeth | Fine, closely spaced teeth generally remove smaller amounts per stroke; wider spacing removes more hair and creates a stronger texturizing effect. | For controlled blending: select a moderate tooth count and avoid aggressive spacing unless substantial bulk removal is intended. | Tooth design directly affects how much hair is removed and how smoothly the result blends into surrounding sections. |
| 4 Evaluate Cutting Action | Blade alignment and movement | Both blades should open and close smoothly without catching, grinding, wobbling, or leaving a visible gap when closed. | Perform 10 slow open-and-close cycles: resistance should remain even throughout the movement. | Smooth action improves accuracy and helps prevent uneven pulling or snagging during texturizing. |
| 5 Inspect Material Quality | Steel, finish, and durability | Look for corrosion-resistant stainless or professional-grade alloy construction, a clean finish, and accurately formed teeth. | Inspect under bright light: surfaces should be free from burrs, deep scratches, rust spots, and irregular tooth edges. | Quality materials and precise finishing support reliable performance, easier maintenance, and longer service life. |
| 6 Use an Adjustable Tension System | Pivot and tension control | A practical tension screw or adjustment system should allow the blades to be fine-tuned without becoming loose during use. | Adjust gradually: the blades should close smoothly while staying secure enough to avoid lateral movement. | Correct tension helps maintain clean cutting action and reduces unnecessary wear on the pivot and blades. |
| 7 Consider Size and Maintenance | Overall length and care requirements | Select a size that suits the stylist’s hand and technique, and confirm that the shears can be cleaned, dried, lubricated, and stored safely. | Common professional lengths: approximately 5.5–6.5 inches, with compact options better suited to detailed control and longer options offering broader movement. | The right size improves maneuverability, while regular cleaning and lubrication help preserve sharpness and smooth operation. |
Testing Safety, Maintenance Needs, and Overall Value
Choosing thinning shears is less about shiny steel and more about controlled, repeatable work. I check seven points before purchase.
One, test the tension screw with clean, dry hands. It should turn smoothly, not loosen during a haircut.
Two, inspect the finger rings and grip. A sharp edge is useless if your wrist twists around a poor handle.
Three, close the blades slowly. They should meet evenly without grinding or catching hair. Small defects become noticeable quickly.
Four, examine the teeth under bright light. Even spacing supports predictable texture, while rough teeth can pull strands.
Five, confirm whether the tool includes a safe storage case or protective cap. The U.S. Bureau of Labor Statistics reported 2.4 recordable injuries per 100 full-time private-industry workers in 2023. That figure is not salon-specific, but it supports careful daily tool handling.
Sixth, ask about maintenance. Professional shears need cleaning, drying, lubrication, and periodic adjustment.
A damp drawer is not maintenance. It is corrosion waiting.
Seventh, calculate overall value rather than choosing the lowest price. Include sharpening, adjustment, replacement parts, and expected service life.
IBISWorld’s 2024 Hair and Nail Salons industry report identifies operating costs as a continuing business pressure, so durability affects more than comfort. I prefer a shear that cuts consistently after months of use, even if its finish is ordinary.
This is where judgment gets imperfect. A premium price cannot guarantee better ergonomics. Test the balance, make a few controlled cuts, and record hand fatigue after a full working day.
They remove selected bulk while preserving the haircut’s outer shape. Regular scissors create a solid line. Thinning shears create spaces between strands.
Fewer teeth usually remove more hair per closure. More teeth remove smaller amounts and create softer blending. Tooth count alone does not predict results.
High-tooth blending shears usually offer better control. Use one light pass near the mid-lengths. Fine ends can look weak after overworking.
Fewer teeth and wider gaps can remove more weight. Work through small sections around the crown and fringe. Use less pressure.
Thinning can disturb curl patterns and create uneven shrinkage. Shape the hair first. Remove minimal bulk only where necessary.
Many shears remove roughly 10–20% per pass. Results vary with tooth spacing, blade design, pressure, and technique. Test a small section.
Use them on small sections away from the scalp. Keep the blades parallel to the hair section. One quiet snip may be enough.
Avoid repeated cutting over the same area. Check the shape from several angles under bright light. Dense hair can become uneven after one heavy stroke.
Inspect sharpness, tooth uniformity, tension, blade movement, and handle comfort. Poor tension may bend hair instead of cutting cleanly.
No. They are precision tools for gradual weight removal. They cannot rescue every shape. Client feedback still matters, even after a technically neat result.
Choosing the right hair thinning shears begins with understanding their purpose. Unlike standard cutting shears, hair thinning shears remove selected amounts of hair to reduce bulk, soften lines, and create smoother transitions. The best type depends on hair texture and styling goals: fewer teeth may remove more hair quickly, while finer teeth offer gradual blending. Pay close attention to tooth count, blade design, and the estimated hair removal level to avoid creating uneven or overly thin results.
Comfort and control are also essential, especially for frequent or professional use. Look for a balanced handle, smooth finger movement, and a comfortable grip that reduces hand fatigue. High-quality construction should support precise, safe cutting. Before purchasing, consider whether the shears open and close smoothly, are easy to clean and maintain, and include suitable adjustment features. Comparing durability, performance, comfort, and price will help you choose hair thinning shears that provide reliable results and long-term value.